Creating a Gnosis Safe on Milkomeda
Milkomeda C1 Sidechain is fully operational on Mainnet, which means that it is currently deployed and connected to production version of the Cardano blockchain.
Milkomeda C1 now has an instance of Safe (previously Gnosis Safe), a highly secure and tested multisig wallet smart contract. Safe is the most trusted decentralized custody protocol and collective asset management platform on Ethereum and the EVM-based networks.
This integration enables Milkomeda C1 users to access audited and secure multisig services, significantly reducing the risk of unauthorized access or theft. This guide will walk you through the steps required to set up a Safe on the Milkomeda C1 network (available both on Milkomeda C1 Mainnet and Devnet), providing you with the ability to securely manage your digital assets.
Setting Up a Safe Multisig Wallet
To connect to the Milkomeda implementation of Safe, you need to have a MetaMask wallet set up (or other supported web3 EVM-Compatible wallet). MetaMask is a browser extension that functions as a digital wallet and allows users to interact with decentralized applications on the blockchain. If you don't have MetaMask installed, you can download it from the official website and follow the installation instructions in our guide.
Once you have your MetaMask wallet set up, you can proceed to the Milkomeda implementation of Safe. This implementation provides users with access to secure and audited multisig services on Milkomeda's novel interoperability solutions. You can find the Milkomeda implementation of Safe by following this link.
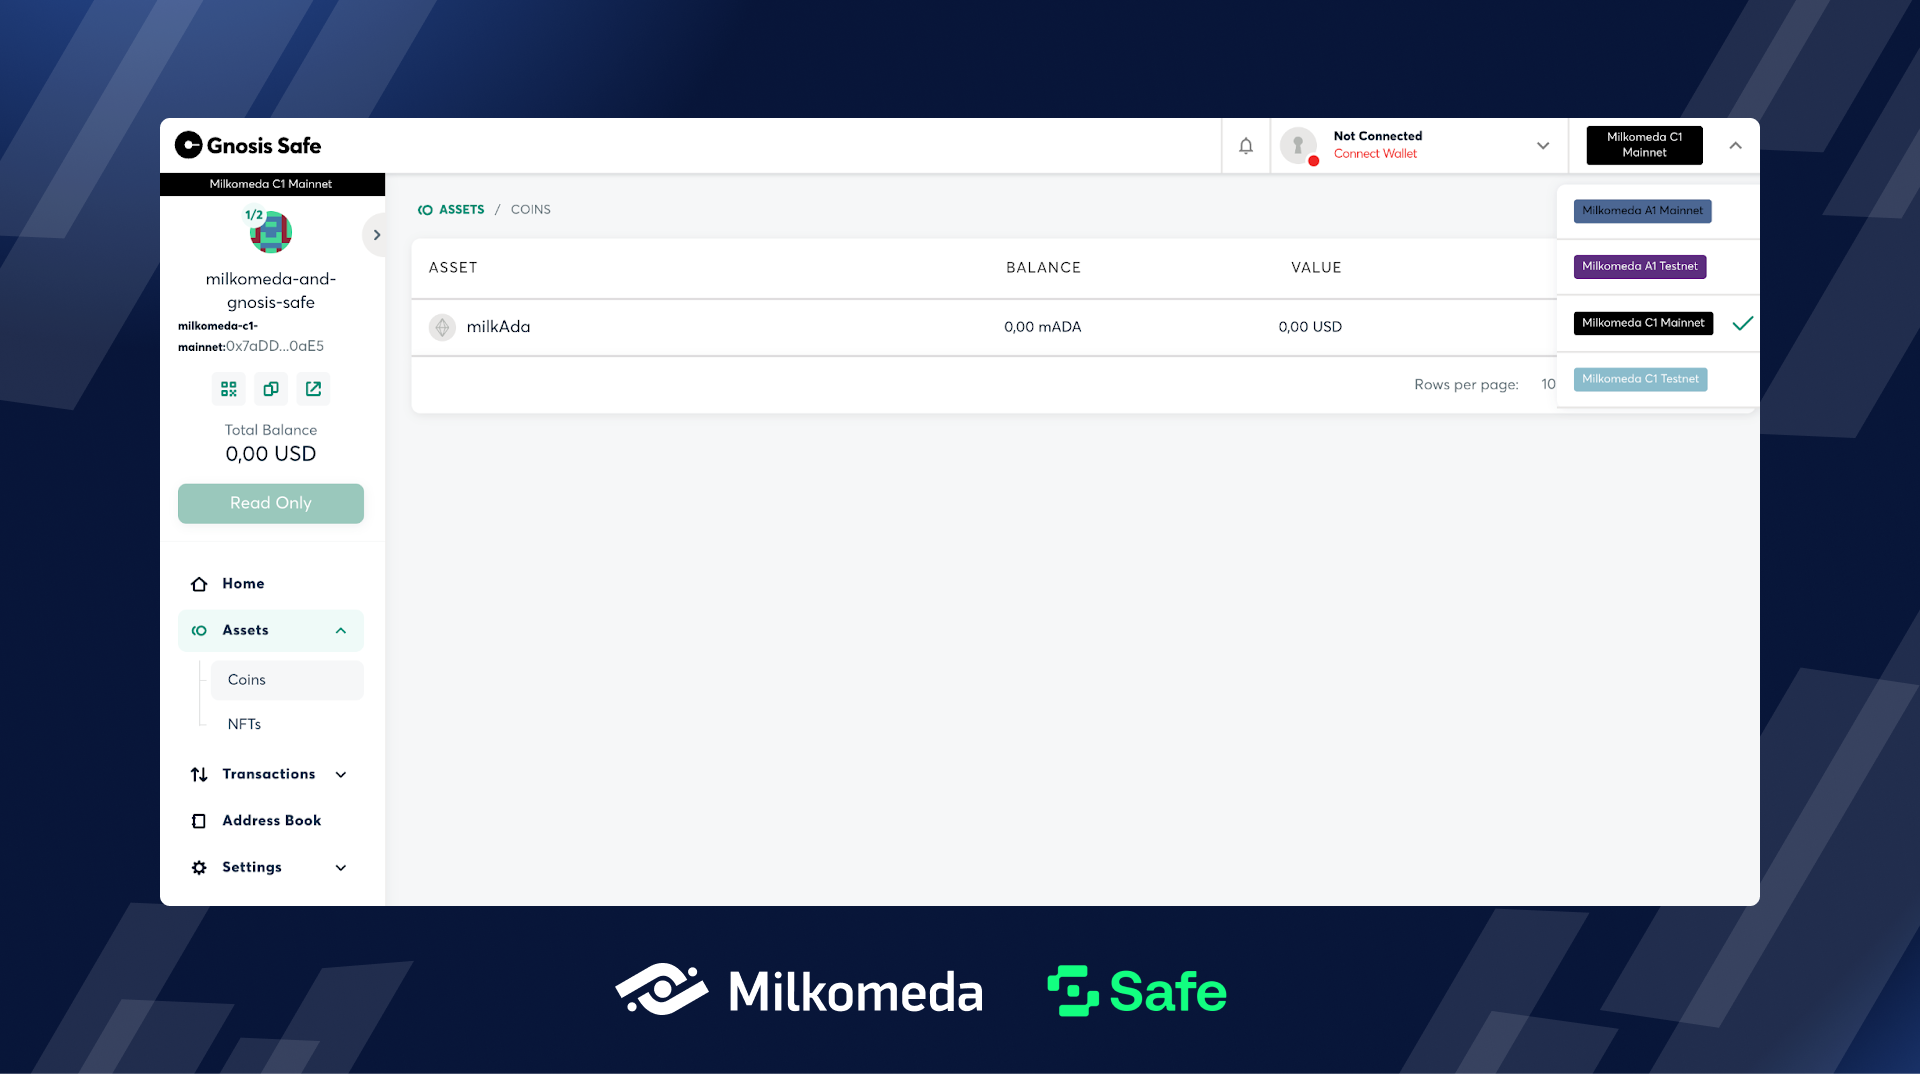
Note: In the top right corner of the page the network is set as Milkomeda C1 Mainnet. If you want to first test this process on the Milkomeda C1 Devnet then you need to choose the desired network from the drop-down.
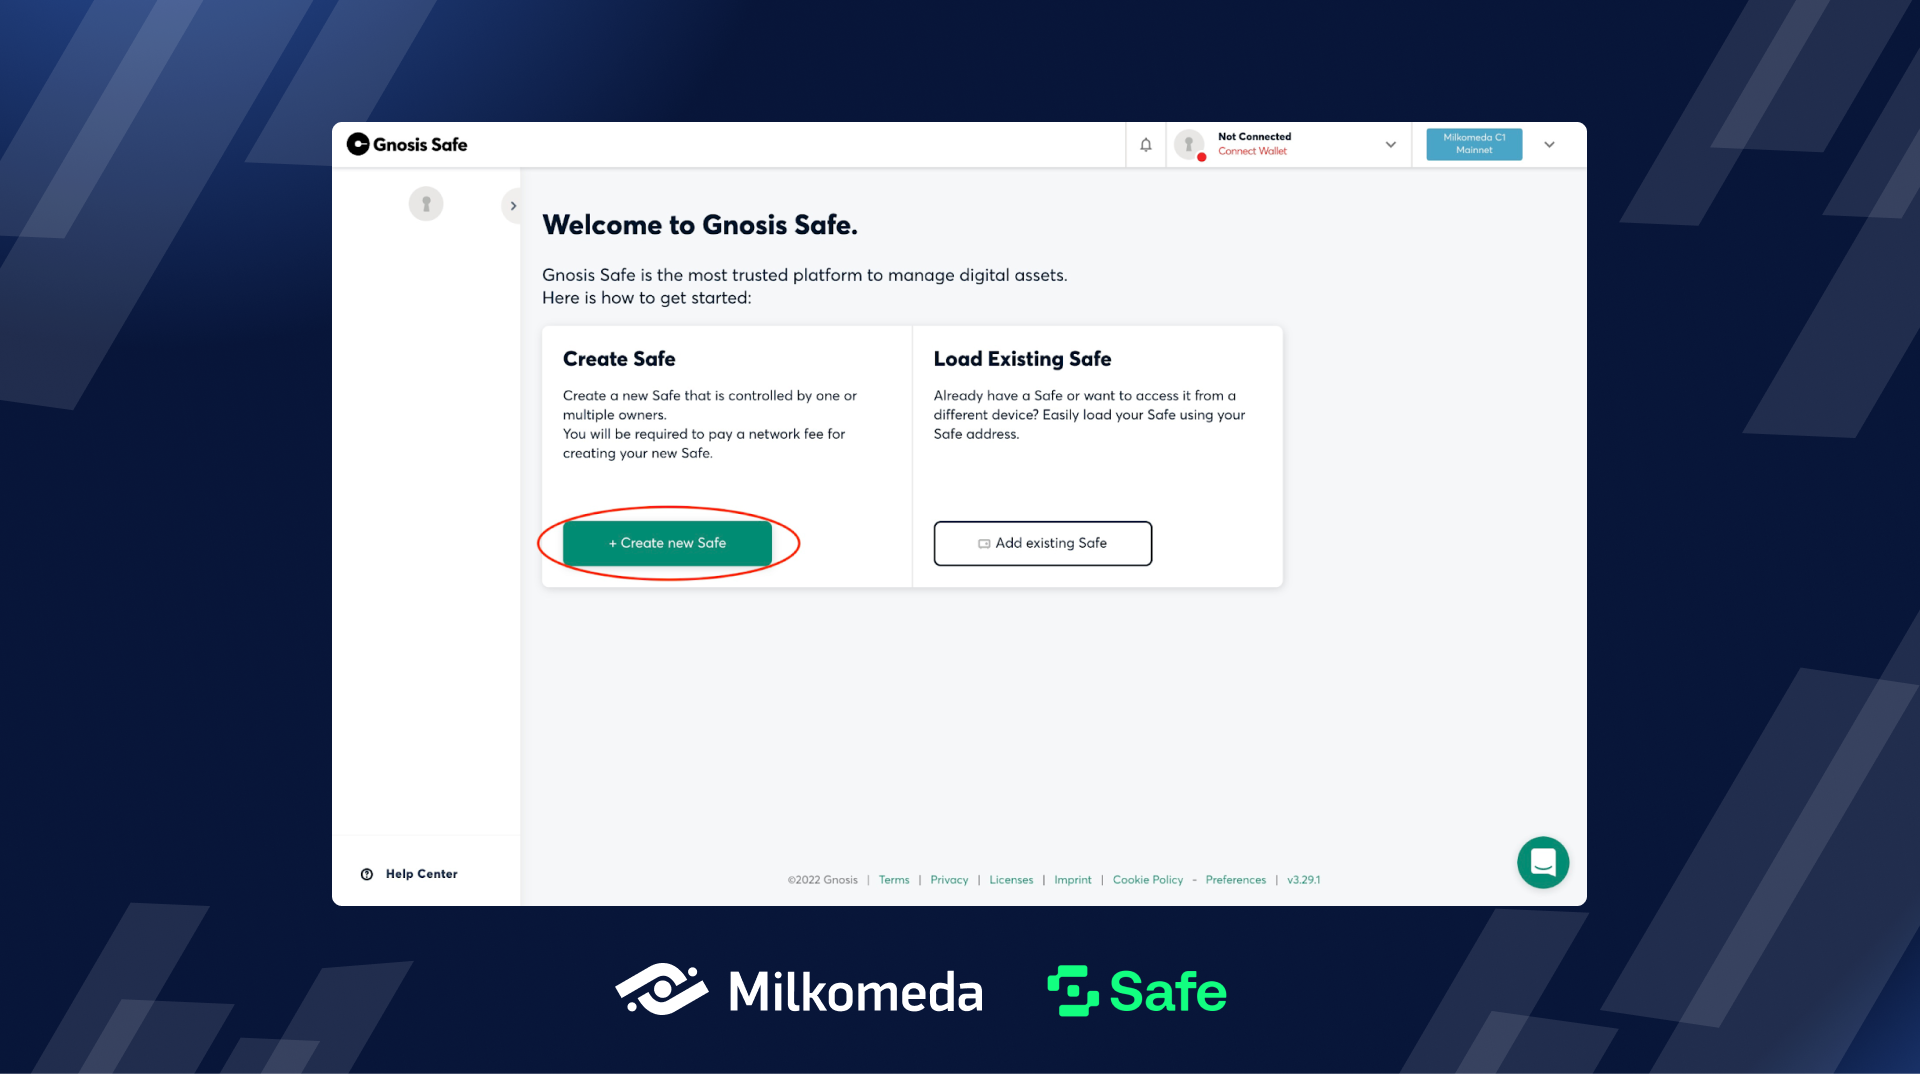
- Visit the Milkomeda implementation of Safe and click the + Create new Safe button.
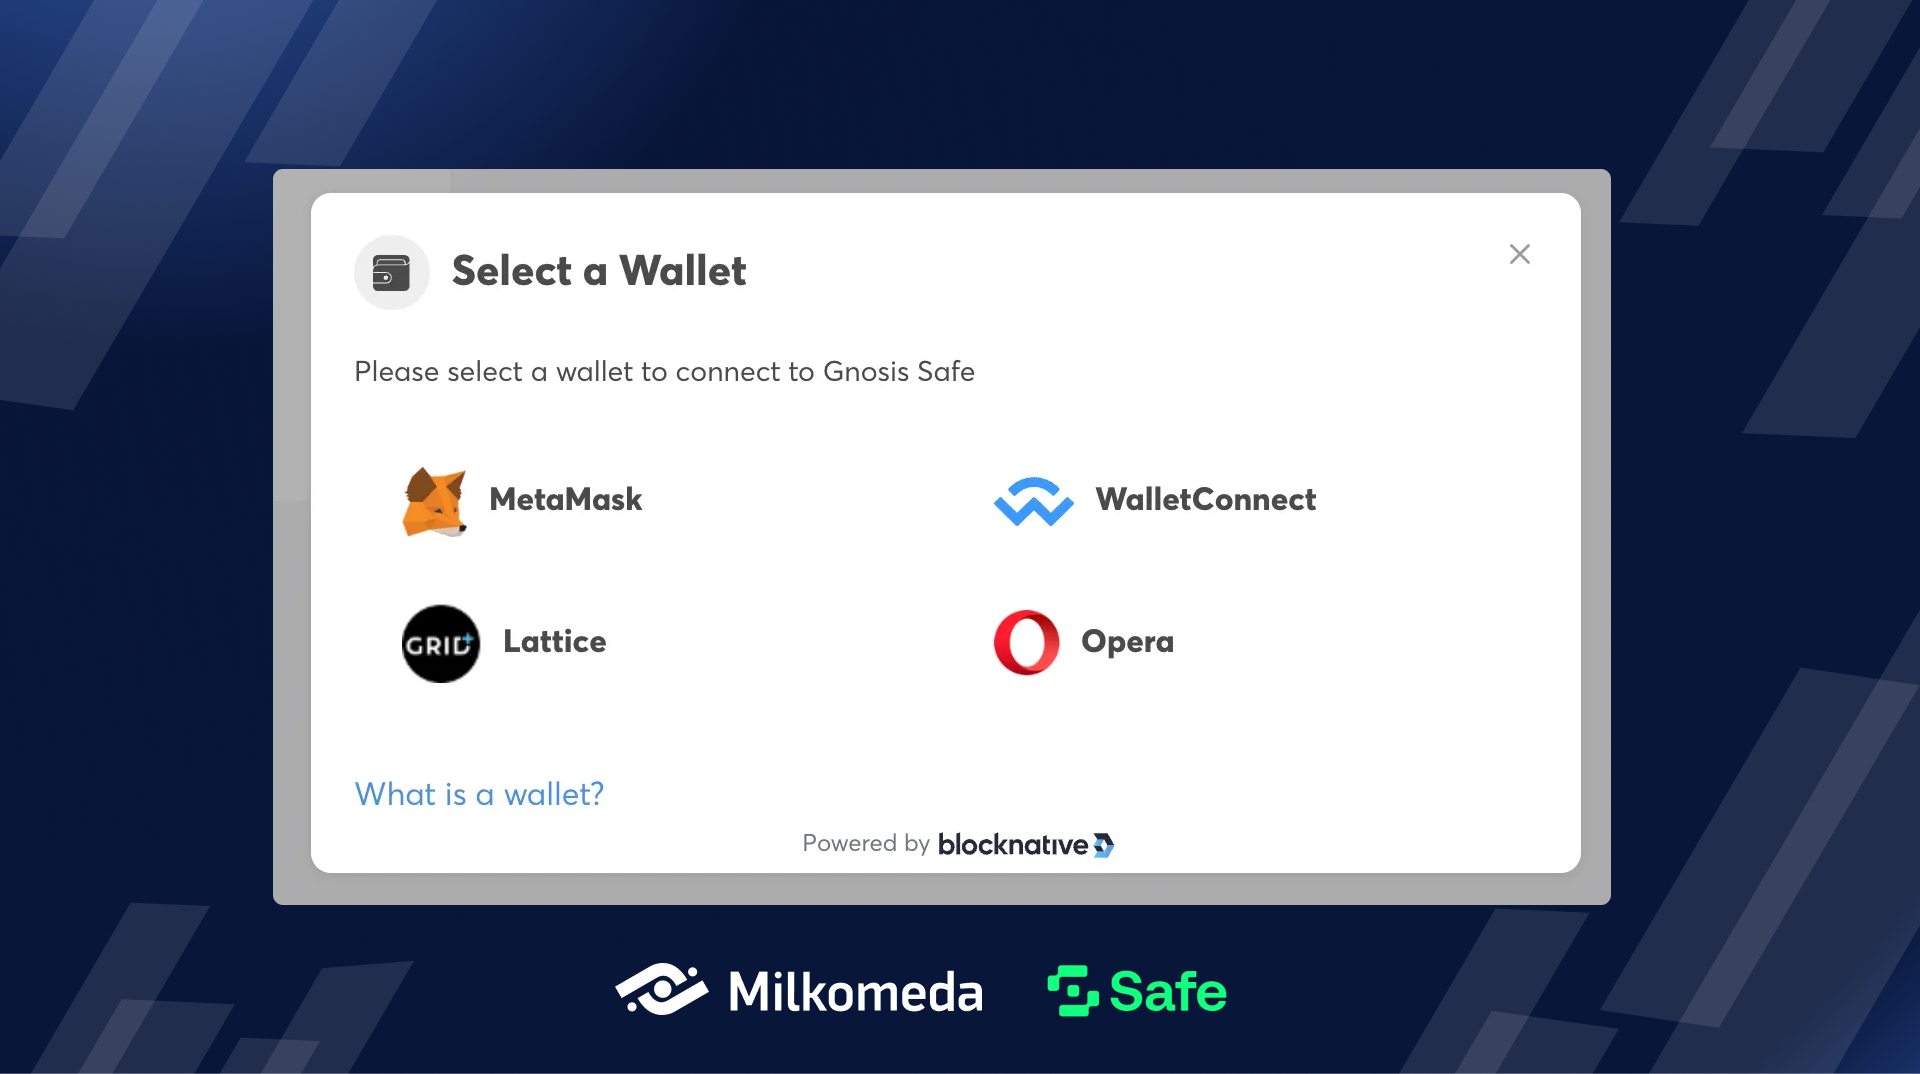
- Click Connect and connect your MetaMask (or other compatible web3 wallet).
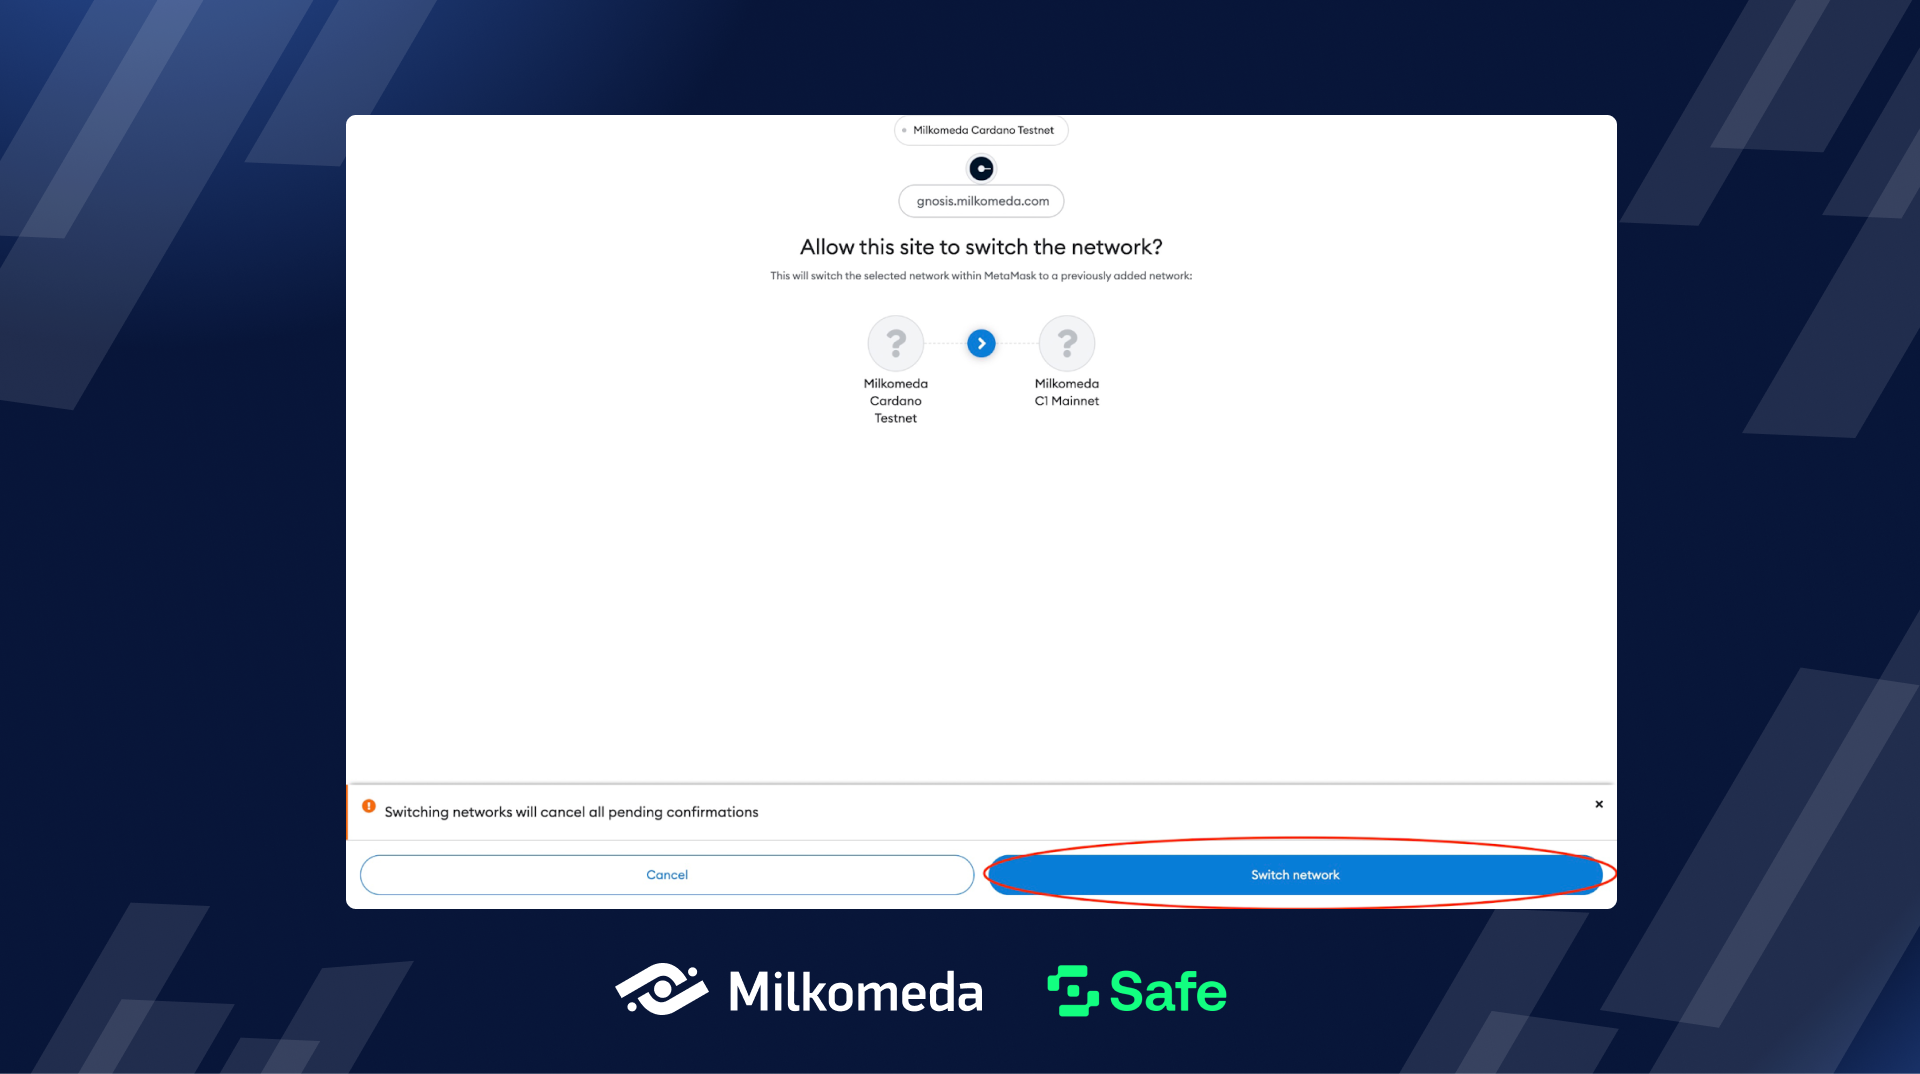
- Open your MetaMask wallet.
If your wallet is not already connected to the Milkomeda C1 Mainnet, you will need to add this network to your wallet. To do this, click on the network dropdown menu in the top center of the MetaMask interface and select "Custom RPC" and follow our tutorial.
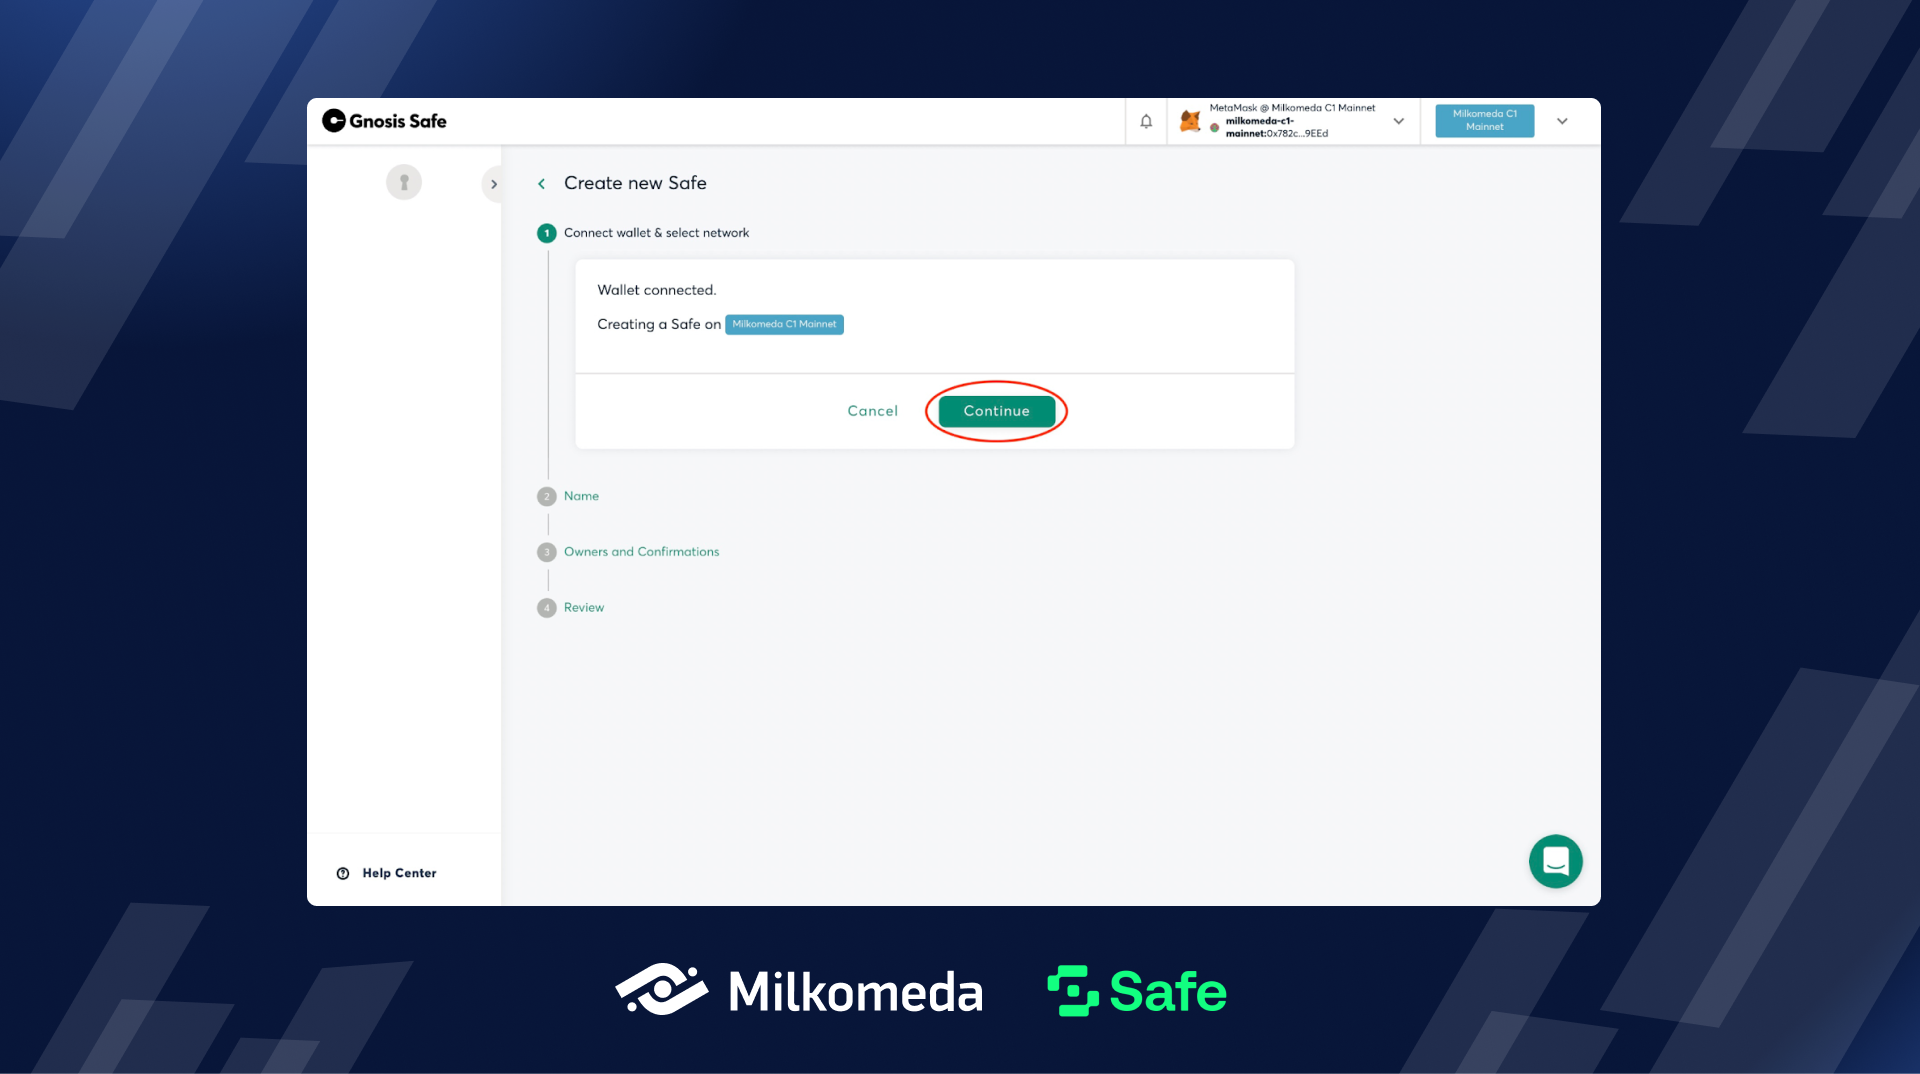
- Once you have successfully connected your wallet to the Milkomeda implementation of Safe, click on the continue button to proceed further.
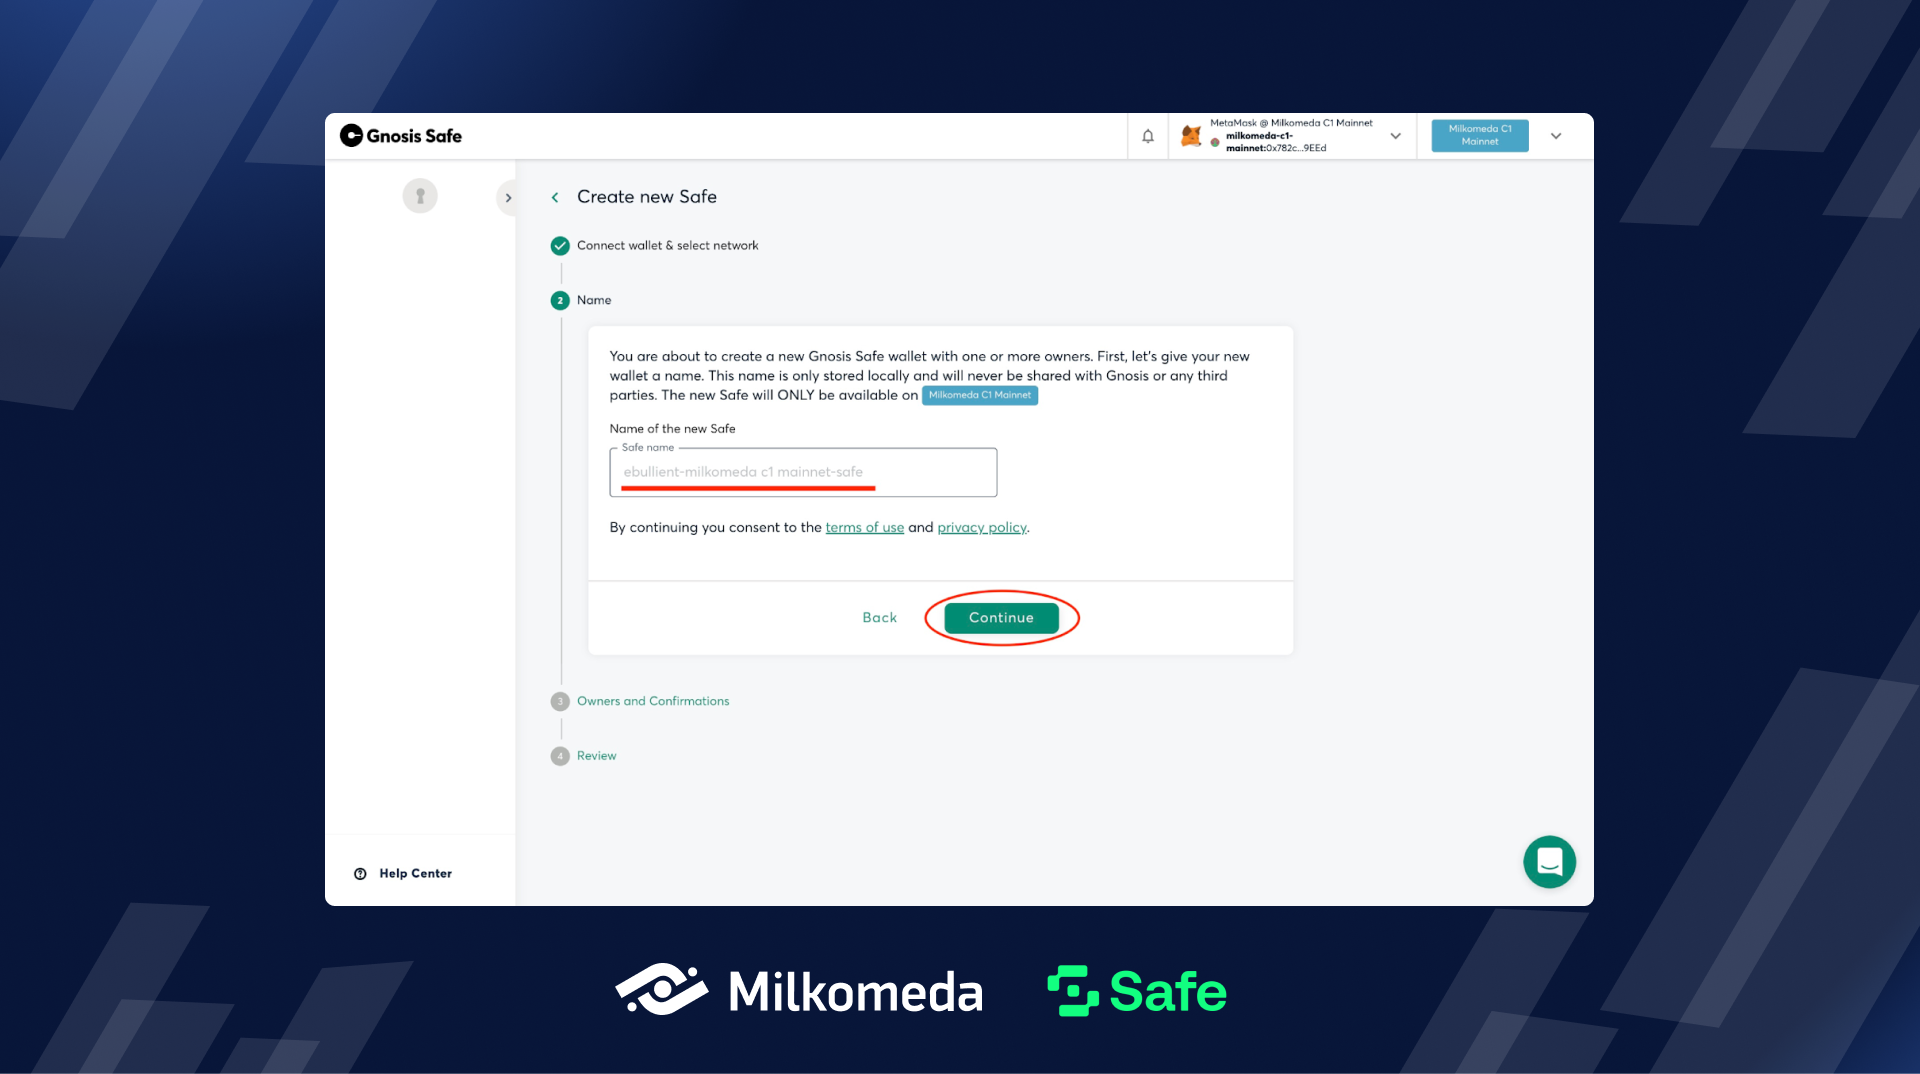
- Give your new Safe a name so you can easily identify it.
- Add each owner of the Safe and their address. Your address will pre-populate the first “Owner Address” box. Add your name and then click + Add Another Owner to add more owners.
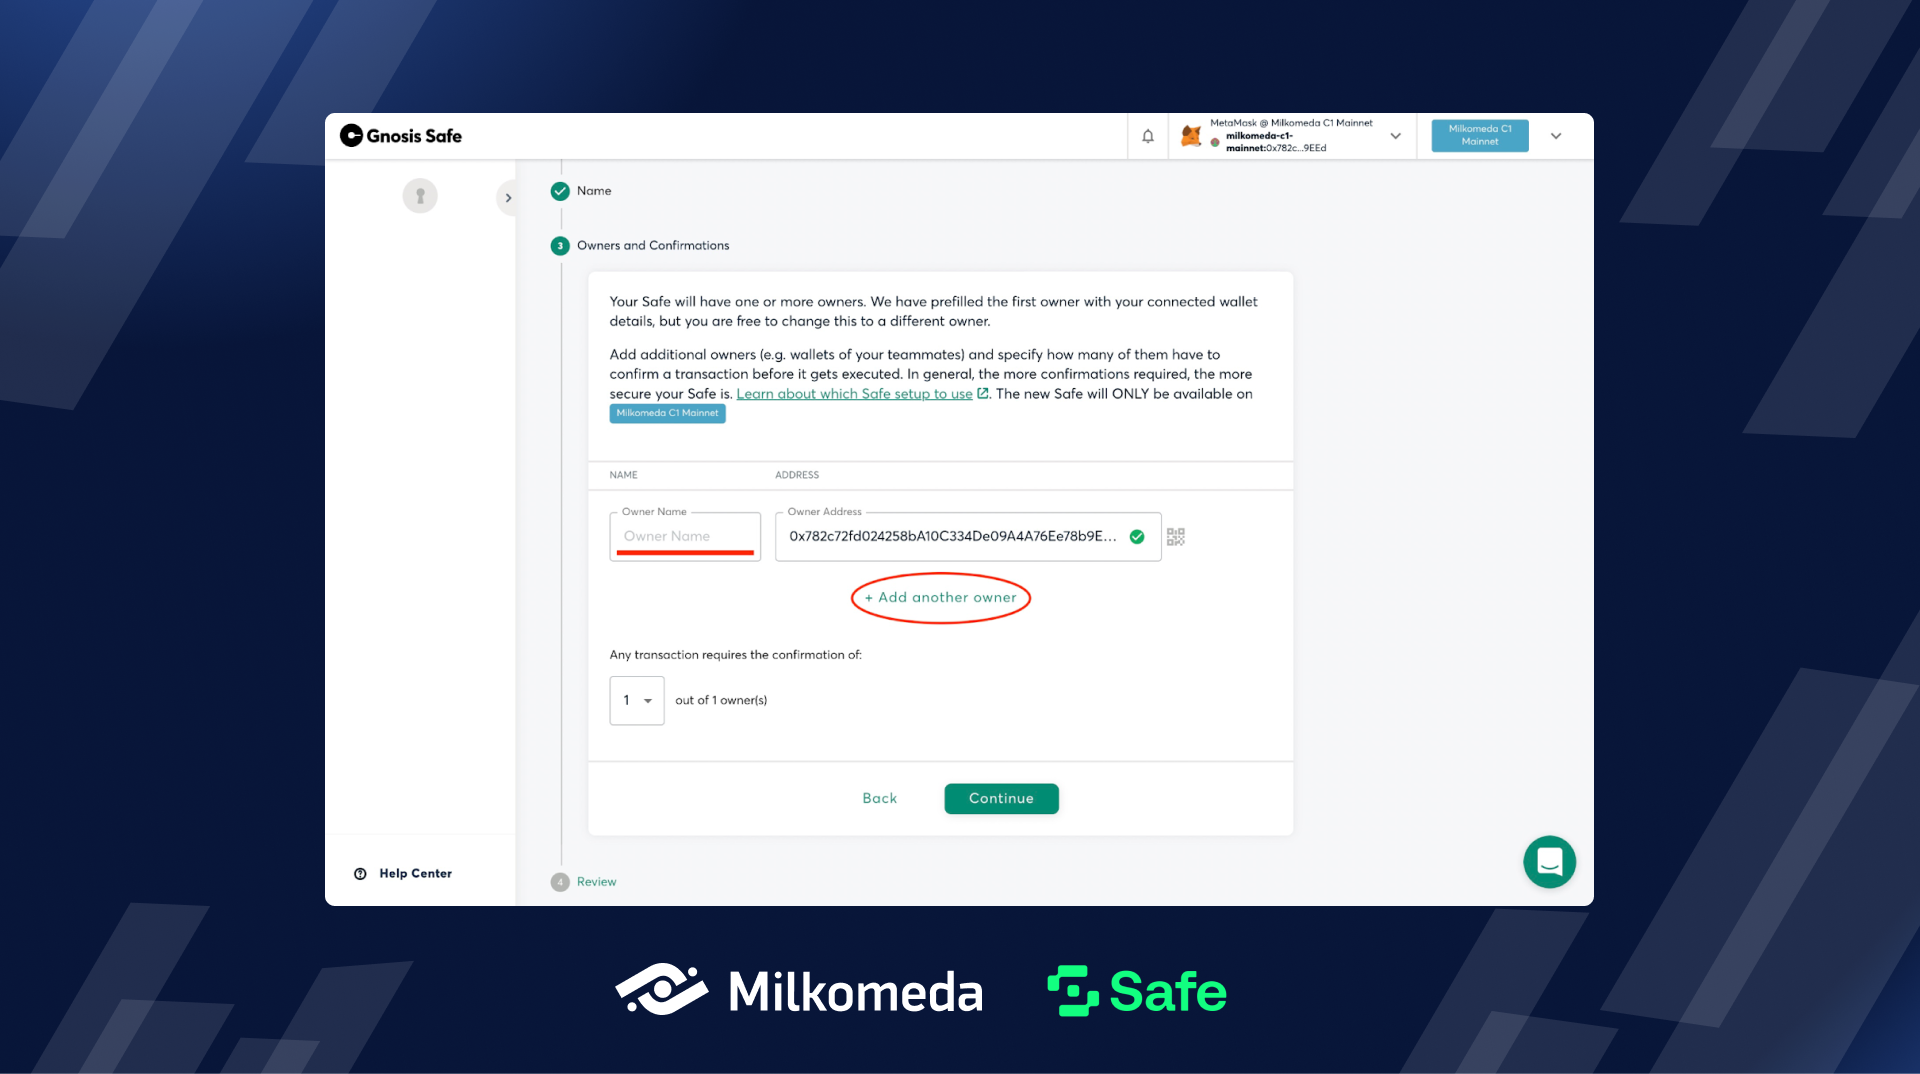
- Repeat step 6 until all the Owners of your Safe are listed along with their Milkomeda C1 addresses.
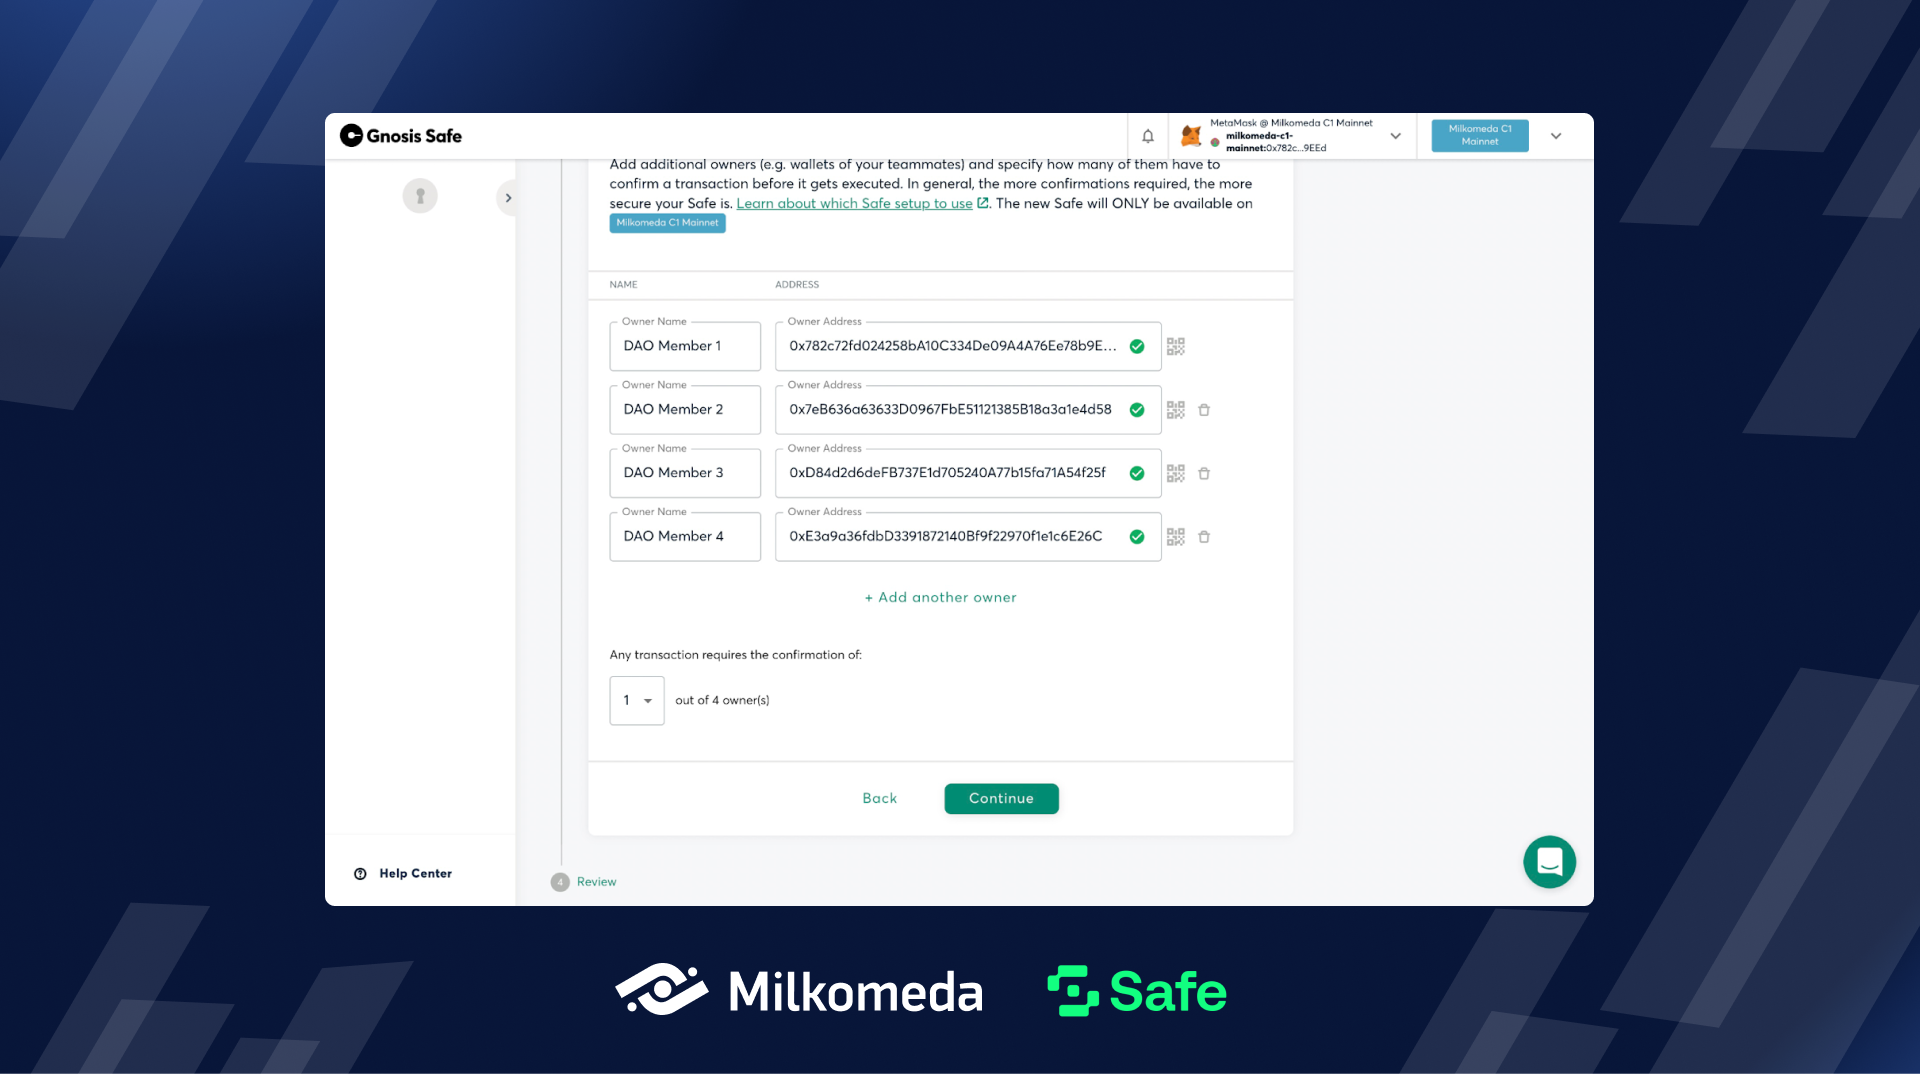
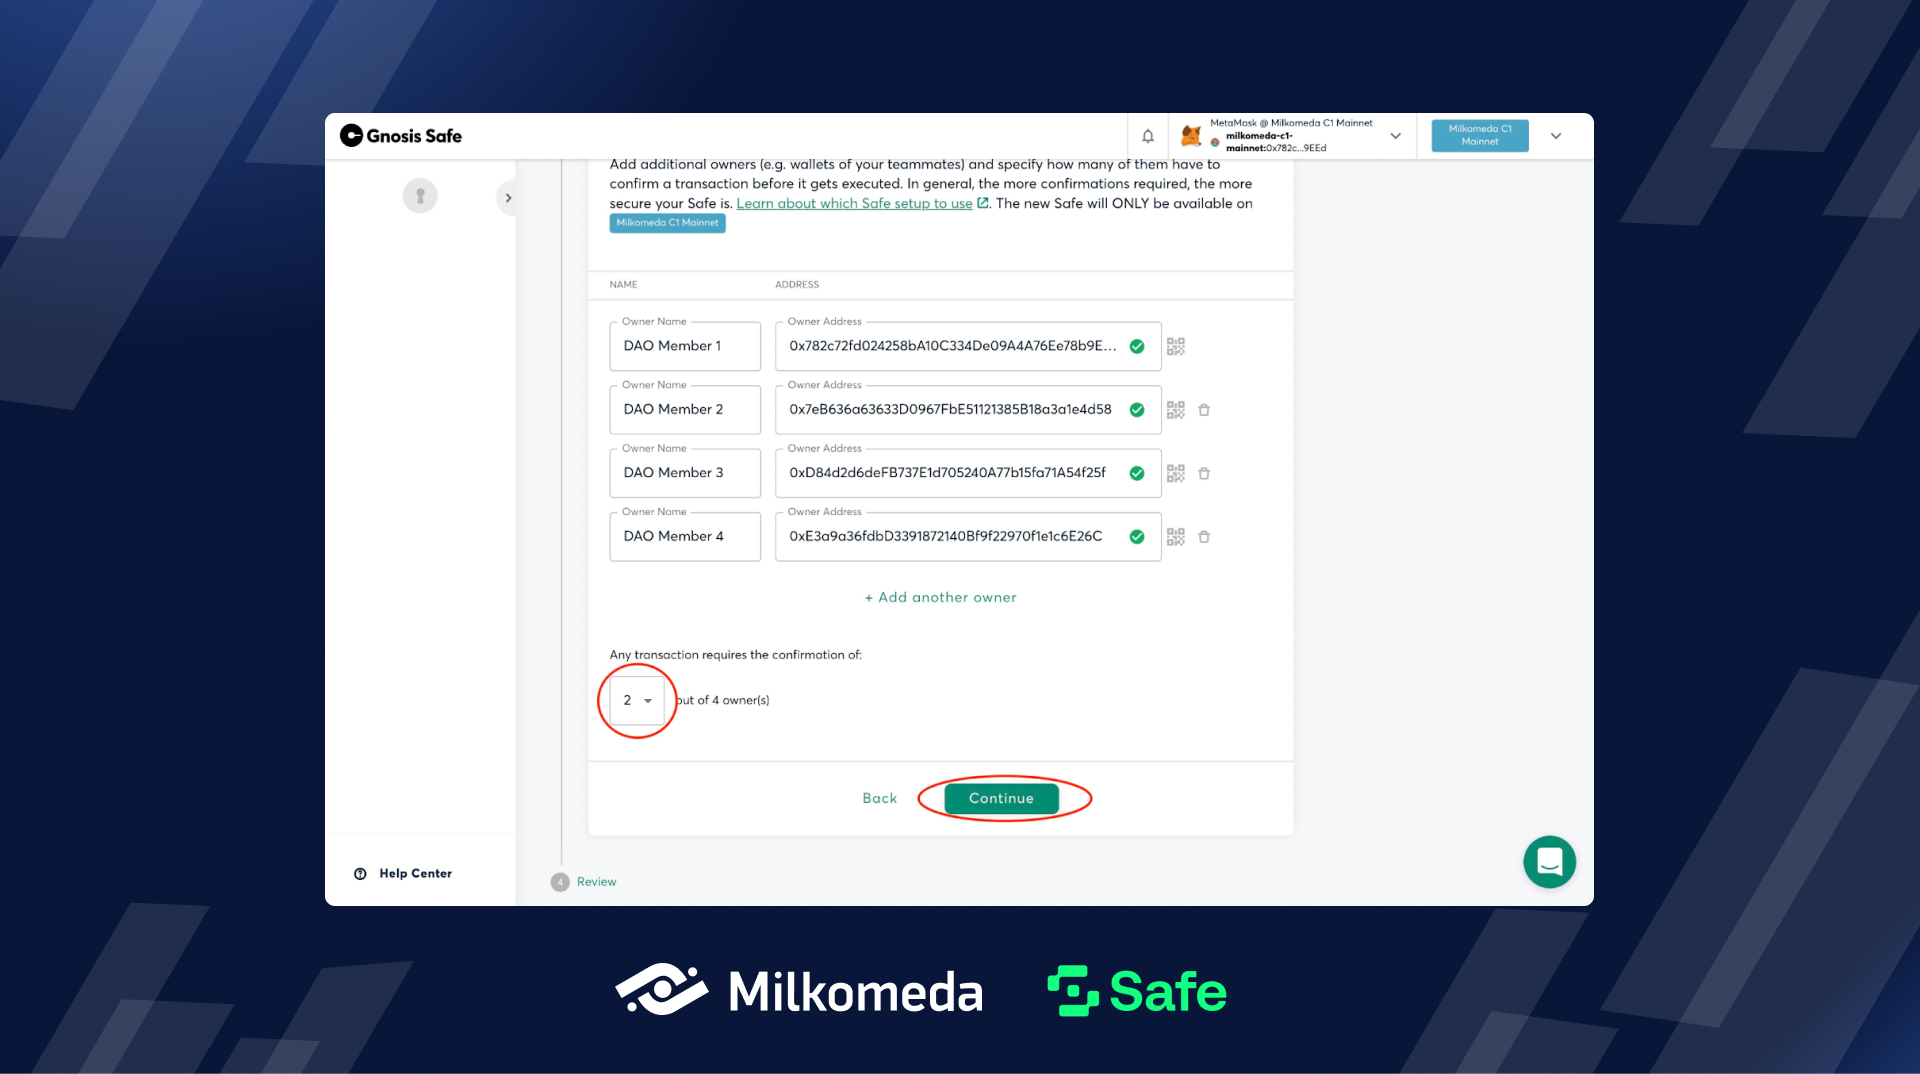
- Select how many Owners must sign a transaction for it to be executed by choosing a number from the drop-down menu.
Selecting the number of required owners to sign a transaction is an important step in the setup process for a Safe. When creating a Safe, the user has the ability to specify the minimum number of required owners that must sign off on a transaction before it can be executed. This allows for an added layer of security, as it prevents a single user or malicious actor from executing a transaction without the consent of the other authorized users.
For example, if a user sets the required number of owners to 2, then any transaction that is initiated will require the approval and signature of at least two authorized owners before it can be executed. This ensures that no single individual has complete control over the Safe, and all transactions must be approved by a minimum number of authorized individuals before they can be executed.
It's worth noting that the number of required owners can be changed at any time after the Safe is created, giving the user flexibility to adjust the security settings as needed.
Use the drop-down below where you entered the owners and their addresses to select the number of signers needed to execute a transaction. Once you’re satisfied with your owners and selection, hit Continue.
How many Owners should you select for your Safe? Gnosis Safe have written a Best Practice article for setting up your Safe and it is excellent reading for those making decisions like this. Read it here.
- Review the setup of your Safe on the final page. If you need to change something click Back. Once everything looks good click Create.

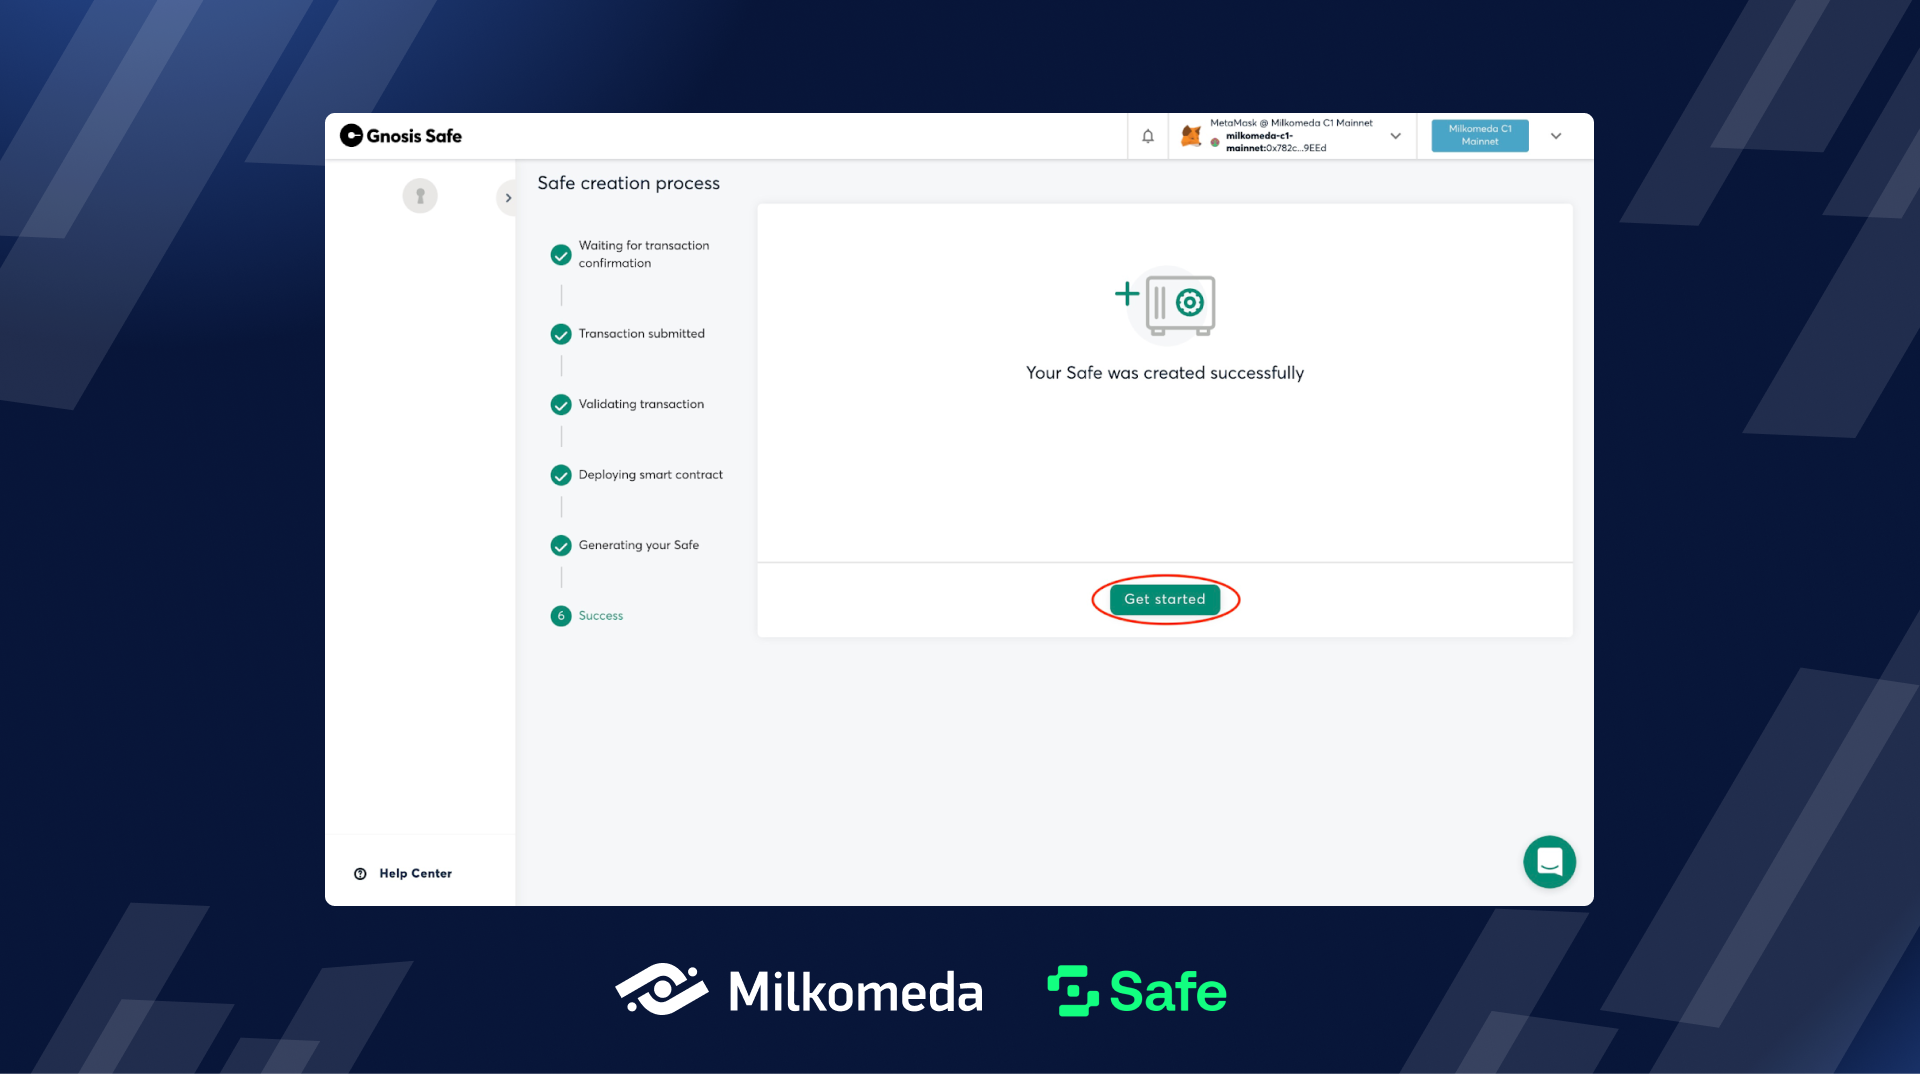
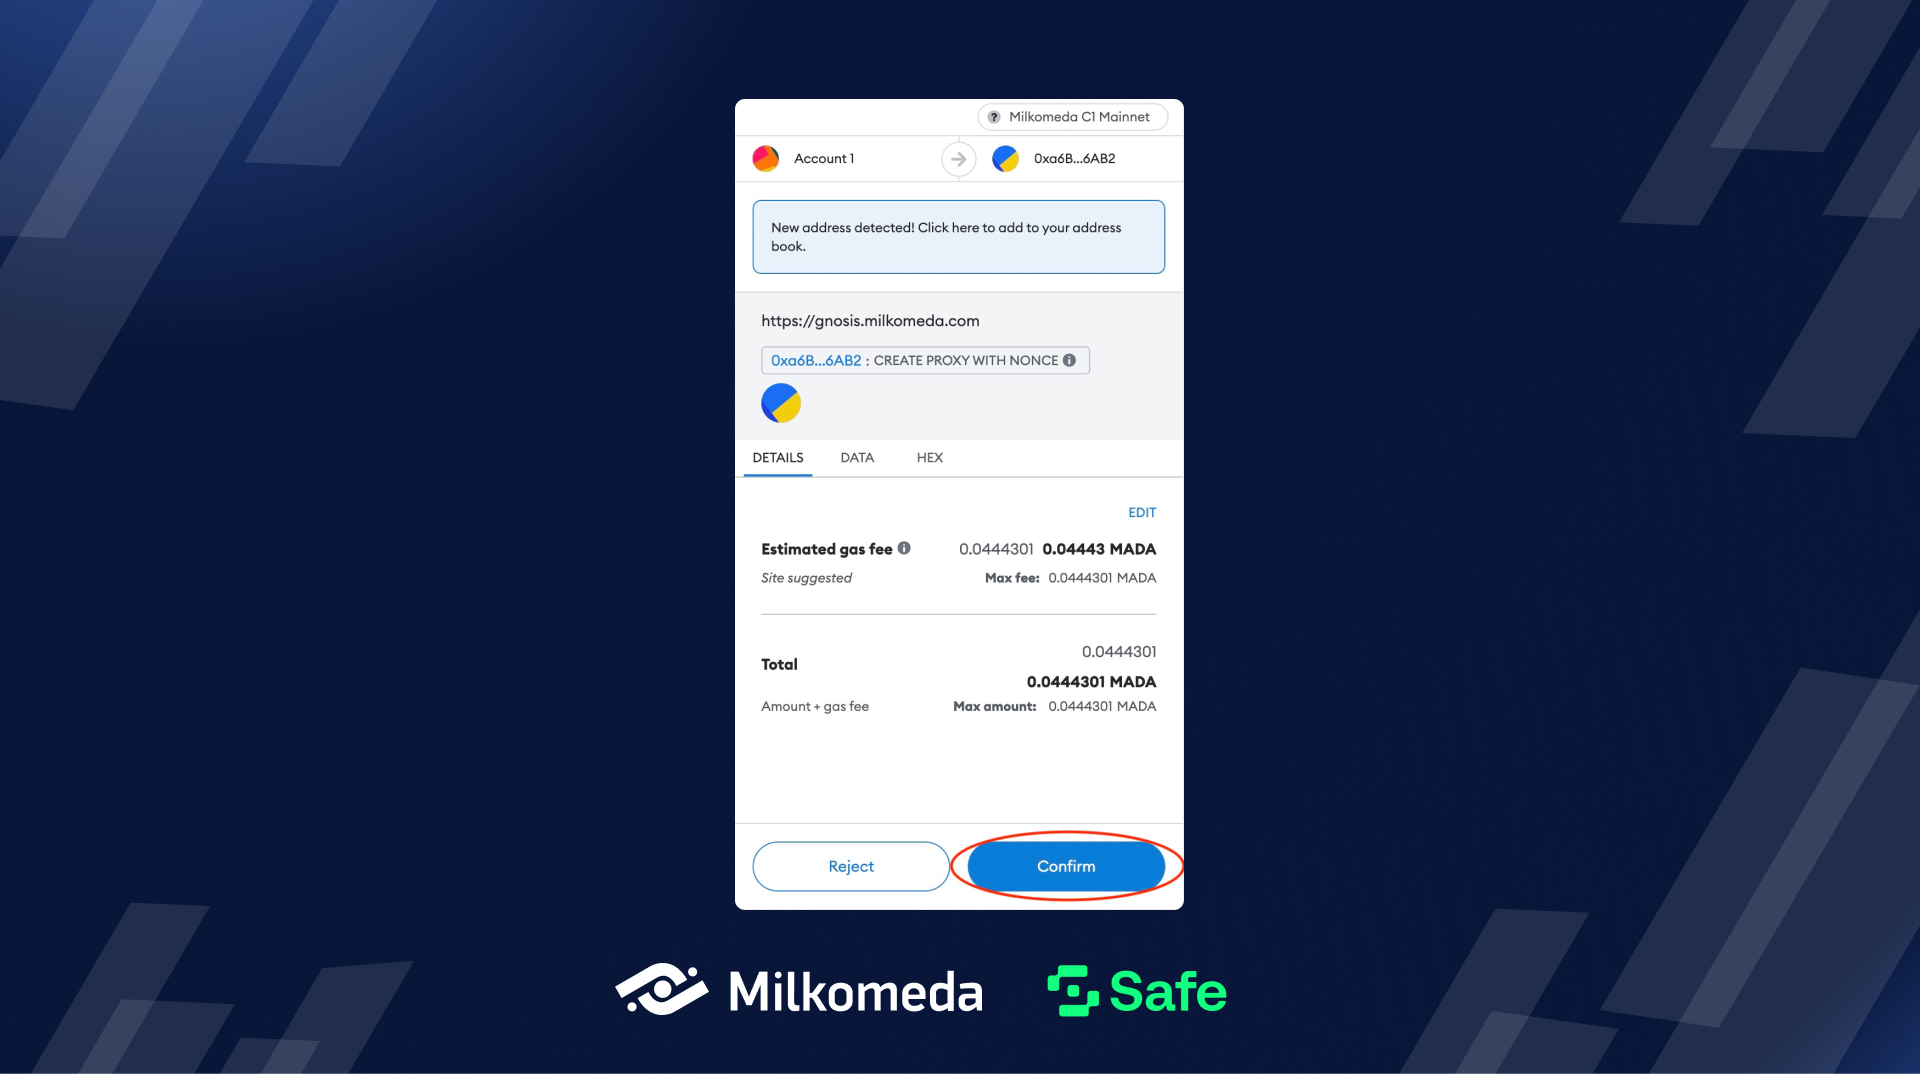
10.Confirm the transaction that creates the Safe in your wallet and wait for the transaction to be confirmed by the blockchain.
Start using Safe on Milkomeda C1
Congratulations! You have successfully set up your Safe on the Milkomeda C1 network. You can now click on the Get started button to enter your Safe and start using a secure and audited multisig wallet on Milkomeda C1. This will enable you to carry out transactions with more security and reliability, giving you peace of mind knowing that your funds are protected by the multisig functionality of Safe.